![Medieval lead alloy, or lead, pilgrim badge. It consists of a the top left corner of a rectangular plaque and is missing the stitching ring that would have projected outwards from the plaque. It originally depicted SS Peter and Paul within a border inscribed [SIGNA APOSTOLORVM PET]RIETP AVLI +. The. The complete workflow for machine identification, badge to written finding](/covers/from-first-step-to-finish-machine-identification-explained-1920.webp?v=74878966)
Guides
The complete workflow for machine identification, badge to written finding
From first step to finish: a complete workflow for identifying an unknown sewing machine, from badge and serial through mechanism evidence to a written finding.
What to take away
- Run the seven steps in order: photograph, badge and serial, mechanism, measurements, records, comparison, written finding.
- Badges name sellers far more often than makers. Treat the mechanism and the measurements as primary evidence.
- Serials are stamped in a few known places. Copy every character under raking light before you clean anything.
- Write the finding with one confidence word, and note what evidence would change it.
- Most machines finish at probable. Said plainly, that is a finished answer.
The seven steps in order
Each step produces a record you will quote later. Memory is not a record.
- Photograph first.Cover the whole machine, both ends of the arm, the badge straight on and every number. Lighting marks, not beauty, when you photograph antique sewing tools explains why raking light beats a bright room. Log the file names.
- Read the badge, then hunt the serial.Note the wording, letterform, color and placement. Note each serial string and its location.
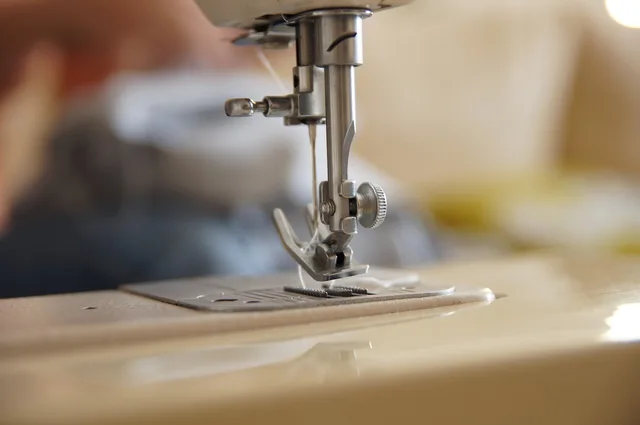
- Identify the mechanism.A vibrating shuttle, a transverse shuttle, a rotary hook and an oscillating hook look different under the bed, and each drives a different family of parts.
- Take the six measurements.In millimeters, always. Two of them usually settle a disagreement that photographs cannot.
- Work the records.Patent dates on castings, tension assemblies and plates, plus trade catalogues and published serial tables.
- Compare with documented machines.A parts diagram beats a photograph of someone else's machine. Check the hidden side too.
- Write the finding.One page, four lines: claim, evidence, gaps, confidence.
Machine identification workflow order
- Photograph everything before touching anything
- Transcribe every mark exactly
- Describe mechanismshuttle, bobbin, feed, tension
- Measure bed, shank, bobbin, needle system
- Search on mechanism plus measurements
- Test against manual or parts diagram
- Write finding with confidence level
Reading the badge and finding the serial
A badge is a sales document. Huge numbers of machines were badged for retailers, catalog houses and department stores, and the same physical machine appeared under many names.
Two identically badged machines can also come from different factories in different decades. The badge tells you who sold it, sometimes, and rarely who made it.
Serial numbers are stamped into metal, and rarely in one place only. Check the bed surface at the right rear, the plate under the arm, the handwheel rim, the slide plates and the inside of the pillar.
Low raking light raises a shallow stamp. Copy letter prefixes, spacing, stars and hyphens exactly as struck. Do not polish the area first, because abrasives take a shallow strike down to nothing.
Reading a badge against surviving retail records is easier with help. The guide to museums, guilds and libraries that teach identification skills lists places that will look at a machine with you.
Published serial tables map number ranges to years, so the table is the authority rather than the prefix itself. The history of the Singer company and its serial number dating is a fair starting point for that reading. A patent date on a badge sets a floor for the design, not a build date.
Example: one badge, one serial, one finding
Badge reads a retailer name and city, no maker. No serial on bed, plate or pillar. Mechanism: vibrating shuttle under the bed. Bed long and narrow, low shank, long thin bobbin. Tension assembly carries a 1911 patent date. Finding: probable late vibrating shuttle machine, badged for a retailer, built after 1911, maker unconfirmed.
The example matters for its order, not its machine. Every claim traces to a record.
The measurements that do real work
| Measurement | Why it matters |
|---|---|
| Bed length and width | Sorts full size from three-quarter and portable classes |
| Shank height | Groups the machine into a feet and attachment family |
| Bobbin diameter and height | Identifies the bobbin system directly |
| Needle system | Confirms the family and rules out lookalikes |
| Handwheel to bed center | Distinguishes some closely related classes |
| Presser bar to needle offset | Separates slant machines from upright ones |
Record all six in millimeters and date the note. Calipers beat a tape measure on bobbin and shank. What belongs in a first tool kit for vintage sewing machines, and what does not covers the rest of the bench, including the light you need for stampings.
Going to primary records
Patent numbers on castings and plates lead to documents you can read.
The USPTO's Public Search Facility in Alexandria, Virginia provides public access to patent and trademark information in several formats, with staff on hand to assist searches. As of January 2026, its print collections are no longer available, and searching is done on the facility's workstations.
Archival material takes a different route. The National Archives explains in its guidance on planning a research visit that it performs only limited research on behalf of the public. Some record types can be ordered online, and lists of independent researchers cover extensive work.
Writing the finding and setting a confidence level
Write four lines. The claim in one sentence. The evidence item by item, each with its source. The evidence you looked for and did not find. Then one confidence word.
Keep the vocabulary fixed: confirmed, probable, possible, unresolved. Define the word you choose in the same line, so a reader knows what probable means in your hands.
A finding that names its own gaps survives the next record that arrives.
Keep the finding with the machine. Identification feeds consumables, attachments and any later talk of value, and staging a restoration with decision gates and honest exits shows how to carry a probable identification into a parts order without overselling it.
Common questions
What if there is no serial number anywhere?
Can a photograph alone identify a machine?
How long should this take?
Is a forum identification good enough?
In this guide
- Machine identification companies: what to do insteadMachine identification companies do not sell a course in this skill. Learn instead from museums, a collector society, institutions and auction previews.
- The twelve-frame evidence set for photographing machine identification claimsHow to photograph and present machine identification: the twelve-shot evidence set for identifying a sewing machine, how to light a worn serial stamp.
- Loupes, calipers and gauges compared for machine identification beginnersA beginner's comparison of loupes, calipers and gauges for reading serial numbers, plating wear and cast metal marks on vintage sewing machines.
- Machine identification learning plan: a weekend drillA machine identification learning plan for a weekend: photograph a vintage machine, check serial and maker references, test hypotheses, and write a finding.
- Machine identification storage: folders, scans, reviewMachine identification storage: one folder per machine, careful scanning, safe paper storage, and a yearly review of every file.