Reviews
Part of Sewing machine attachments for people who want the details
Reading patent markings before buying sewing machine attachments in 2027
The opening five sewing machine attachments worth buying, what to defer, and how to read the patent and trademark markings stamped on old attachment boxes.
What to take away
- A number after PAT. is a granted patent. Search it free and the grant date gives you the earliest date the item could have been made.
- PAT. PEND. gives a bracket, not a date. The item was made after the application was filed and before the grant.
- A trademark on a box names a brand or a seller. It does not identify the workshop that made the mechanism.
- Check the lid, the end flaps, the sole, the shank and the lever. Worn stamps read best in low, angled light.
- Fit beats provenance. A well-dated attachment that will not mount your machine is still unusable.
Where the stamps sit on a box or a tool
Boxes carry more than the attachments inside them. Start with the lid face, then the end flaps, then any paper label pasted inside the lid or the base. A dealer's name on a flap often postdates the tool by decades.
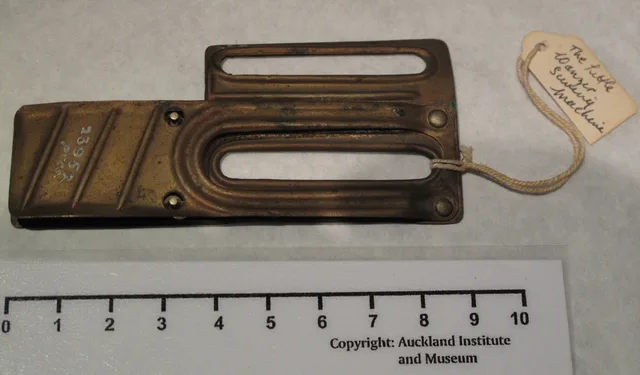
On the tool itself, work in this order: sole, shank, lever arm, hinge pin. Many makers stamped one surface only, and that surface usually faces down in the box.
Worn impressions need direction, not brightness. Hold a flashlight close to the steel at a shallow angle and watch the die marks lift out of the surface. The lighting method in our guide to photographing antique sewing tools is built for exactly this problem, and it makes a faint stamp readable in one photo.
What the markings mean
| Stamp on box or tool | What it states | What it dates |
|---|---|---|
| PAT. with a number | A granted US patent | Item made after the grant |
| PAT. PEND. | Application filed, not yet granted | Brackets filing to grant |
| PAT. APPL'D FOR | Same as PAT. PEND. | Same bracket |
| Registered mark, an R in a circle | Mark registered for listed goods | The brand, not the part |
| TM | A claimed mark, unregistered | Almost nothing |
| MADE IN plus country | Origin of manufacture | Weak, but rules out eras |
The vocabulary is narrower than it looks. Plain definitions sit in the USPTO glossary of intellectual property terms, and ten minutes there stops you paying a premium for a mark that proves nothing about the part.
How to look up a patent number
- Copy the stamp exactly, every digit and any letter prefix. US design patents start with D, reissues with RE.
- Open USPTO Patent Public Search and choose the patent number field.
- Type the number without commas. Add a country code only for a foreign patent.
- Open the front page and read four thingsfiling date, grant date, inventor, assignee.
- Note that USPTO full text coverage generally starts in 1976. Older patents are still found by number, classification or inventor name.
The grant date matters most for dating. An item stamped with a patent number was made after that grant, and the gap could run from months to sixty years. A stamp is a floor, never a manufacture date.
When a marking leads nowhere, the search training and library help gathered under access our free services costs nothing and covers the dead ends that stop most buyers.
Example: dating one foot from a single number
Work through a hypothetical. The sole is stamped PAT. 4750 and nothing else. Searching 4750 in Patent Public Search returns Elias Howe's lockstitch patent, granted in 1846. To rehearse that lookup on cheap scrap tools first, our weekend practice drill turns it into a routine check.
That one result does two jobs. It sets 1846 as the earliest possible manufacture date. It also tells you the maker was citing a famous, long-expired patent as a selling point.
For Singer work, patent dates and serial numbers cross-check each other. The history of the Singer company supplies the dating context for both.
What a registered trademark on a box does not prove
The circled R means a mark is registered for a class of goods. That is a statement about a name used in commerce. It says nothing about who cast the iron or ground the sole.
Boxes were reused, relabelled and rebound. A dealer's mark on a flap can postdate the tool by decades, and the original maker's name sometimes survives under a pasted label.
Treat marks as evidence, not proof. Record what you see, photograph it, and weigh it against the mechanism in your hand.
Fit before function
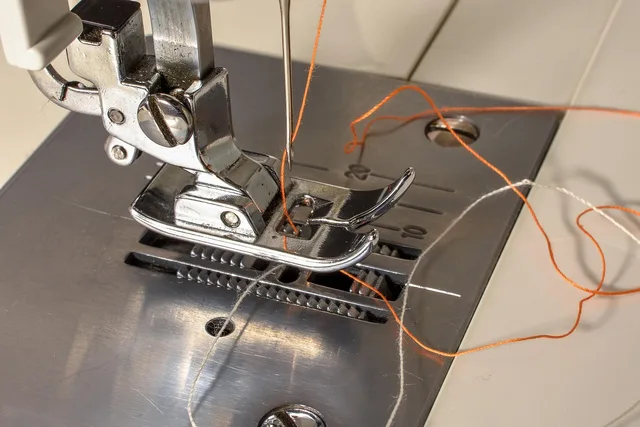
Measure the shank before you read a single stamp. A patent date will not tell you whether a foot mounts on a low shank, a high shank, a slant shank or a back-clamping machine.
Our attachment buyer comparison takes the measurement and the clearance test step by step, and it is the sensible first read before you buy a boxed set you cannot inspect.
Then run your own clearance check. Fit the attachment with the needle up, turn the handwheel by hand, and watch the needle bar and the presser bar for contact.
Buying order still matters
Markings change what an attachment is worth. They do not change the order that makes sense for a beginner. A correct general purpose foot, a zipper foot, an edge or blind hem foot, a narrow hemmer and a walking foot still cover most domestic sewing.
First Five Attachments
- 1. General purpose footdaily sewing
- 2. Zipper footstitches close to raised edge
- 3. Edge or blind hem footrepeatable line
- 4. Narrow hemmersaves most time
- 5. Walking foot or adapterthick layers
Buy one at a time and use it for a week before adding the next. A tool you never mount teaches nothing, and the general purpose foot is the one you reach for daily.
Defer anything that fits a single machine until you know you are keeping that machine. The rule is easy: if the attachment only works on one of your machines, it waits.
Once you can date a tool, the review of antique sewing tools worth knowing shows how that date shifts the standing of each category.