Guides
Part of Reviewing antique sewing tools worth knowing: strengths, gaps and a verdict
Antique sewing tools learning plan: handling, measuring, weighing, cataloging
An antique sewing tools learning plan for one weekend: handle, measure and weigh five objects of one kind, catalog them blind, compare and file the entries.
What to take away
- Two days is enough to learn a category properly if you work with five objects, not fifty.
- Handling technique comes before everything. Skin contact damages metal over years.
- Mass alone does not separate solid silver from plate; mass plus volume, read against the marks, does.
- Write the catalog entry before you look anything up, then correct it in a different color.
Before the weekend: assemble a working set
Gather five tools of one kind — the foundation of any antique sewing tools learning plan. Five thimbles, or five hem gauges, or five shuttles. Mixed materials are ideal: one silver, one plated, one steel, one bone or horn, one plastic. Buy the cheap end of the market, because damaged examples teach more than perfect ones.
You also want a soft towel, a light-colored tray, a lamp, a loupe, a ruler in millimeters, a small kitchen scale, a narrow graduated cylinder, and a notebook.
Saturday morning: handling
Set the towel down, wash and dry your hands, and use no hand cream. The National Archives is direct about this in its handling guidance: clean, lotion-free hands are preferred for paper because gloves catch and tear and transfer dirt, while photographs and negatives do need gloves because fingerprints stain them permanently. Metal, bone and horn tools are not paper, so treat that advice as a starting point rather than the whole rule.
Small tools sit between those two cases. Bare clean hands give you the grip and feel you need, but sweat and salts etch silver and plate over time, and the organic and plastic pieces in the same drawer follow their own rules. Anything going straight back into storage gets a wipe with a dry, soft cloth first. Here is what each material asks for:
- Silver and silver plateclean, dry hands or cotton gloves, never rubber or latex, which trap moisture against the surface. Tarnish comes from sulfur in the air, so the real answer is dry storage with a tarnish-inhibiting tissue or bag, not hard polishing. On plate, work gently: the plating is thin, and it is the layer you would be rubbing away.
- Gilt and washed finishesa very thin gold layer over base metal, worn first at the high points. Lift by the edges, and do not rub a worn spot to "brighten" it.
- Steelfingerprints rust, so handle by the edges and wipe with a soft cloth carrying a trace of oil, not water.
- Bone, horn and mother-of-pearlporous and easily stained. Gloves here, dry storage, no solvents or household cleaners, and no swings between damp and hot, which split horn.
- Early plastics such as celluloidskin oils and heat both attack them, and celluloid releases acid as it ages, so bag it on its own rather than letting it sit against steel.
Practice picking each tool up by its strongest part. Never by a hinge, a chain, a spring or a point.
Saturday afternoon: measure and weigh
Record the same measurements on every object: greatest length, greatest width, and mass to the nearest gram. Then add the points that matter for the type you bought.
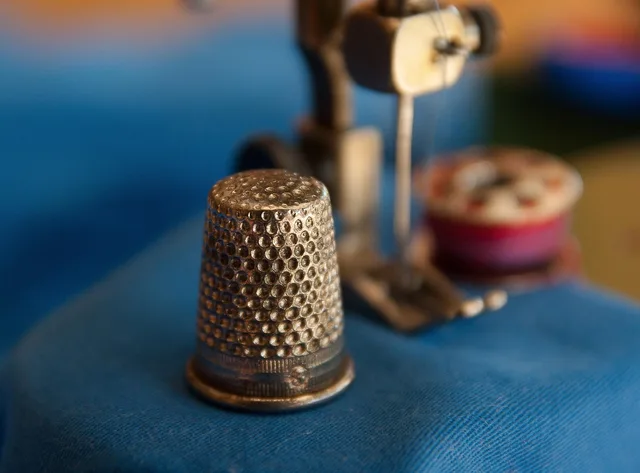
- Thimblesheight, outside diameter across the base rim, inside diameter of the opening, and rim thickness.
- Hem gaugesoverall length, the width of the sliding blade, and the distance from the fold edge to each line marked on the gauge.
- Shuttlesoverall length, the length and width of the bobbin cavity, and the height of the point.
Taking the same points on all five is what makes the numbers comparable. A measurement you take only once teaches nothing.
Mass is the surprise, but mass alone will not separate solid silver from plate. What differs is density, and density needs volume as well. Fill the graduated cylinder partway, note the water level, lower the tool in until it is fully under, and note the new level: the difference is the object's volume, and mass divided by volume is the density. Mass itself is one of the base quantities in the international system of units.
NIST's page on the SI unit of mass explains how the kilogram is now fixed through the Planck constant rather than by a physical prototype. That is why an inexpensive modern scale can be trusted at this level.
Read the marks before the numbers decide anything. In the United States there is no assay office for silver: a solid piece carries a purity word such as "sterling" or the older "coin", while plated goods carry a word or initials such as "plate", "plated" or "EPNS" instead. British and Irish pieces run through the Assay Offices — London, Birmingham, Sheffield, Edinburgh and Dublin — whose maker's marks, date letters and purity marks are what collectors date a piece by. Photograph the marks before anything is cleaned.
Compare your five numbers. The outlier is nearly always the one you had misidentified. Write the figures next to each other rather than on separate pages, because the comparison is what teaches, not the individual reading.
Sunday morning: catalog blind
Write a full entry for each object without looking anything up. Object type, material guess, construction method, decoration, marks transcribed exactly, damage, and your confidence on a three-point scale.
Use the same field names every time, borrowed from a cataloging standard rather than invented. Nomenclature for Museum Cataloging is the standard behind the object type field, and the Getty's Art & Architecture Thesaurus is the working source for material and technique terms. If a record may ever travel outside your own notebook, the Getty's Object ID checklist is the minimum description to write to.
Only then start researching. Correct the entries in a different color so you can see which of your instincts were wrong. Doing it in this order is what builds judgment; looking things up first only builds a habit of looking things up.
Sunday afternoon: compare and file
Lay all five out and rank them by quality of manufacture, then by condition, then by how much you would pay. Three different orders. That mismatch is the whole economics of collecting in one exercise.
File the entries somewhere you will find them again, in the same field order every time, so next year's entry can be laid beside this one. If you want structured instruction after the two days, the guide to antique sewing tools classes and studios worth finding covers how to find teaching that is worth the fee.